
Angry Bird (Yellow)

Body Outline
Insert a new layer.

Use the Line/Curve tool, set to thickness 10px ...
Draw a straight line across the middle of your canvas, not too wide...


Pull down the middle 2 points to create something like this...

Draw another line connecting the top points like this...

Pull up the middle 2 points to create the top of the body like this...

If you click off and the connections aren't smooth, CTRL+Z and adjust the end points. When you're happy with your body shape, rename the layer.

Move the body shape over and down so there's room for the feathers at the top and back later. Use the Move Selected Pixels tool and Enter or CTRL+D when you're done to get rid of the dotted outline.

Body Fill
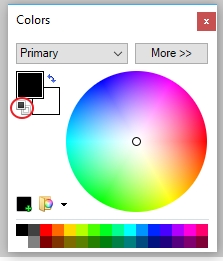
- Set the primary color to a yellow.
- Then click on the body shape with the Paint Bucket tool.


White Chin
Set colors to default again and switch your colors for white is the primary color...

Draw and fill oval to start
- Hide the Background layer for now - it'll make it easier to see what's happening.
- Insert a new layer, call it "chin".
- Draw an oval area for the chin - use the Ellipse Select tool and drag up from the bottom.
- Backspace to fill selected area with white.


Now deselect (CTRL+D).

Delete extra white outside body
- Select the "body" layer.
- Use the Magic Wand tool and click in the body area to select it.

Now we want to select the area outside the body so we invert our selection - you can use the keyboard shortcut CTRL+I or use the Edit menu.

Make sure the chin layer is selected (not the body).
Then use the Delete key (not Backspace) to delete the white outside the body area.


If you CTRL+D to get rid of the dotted outline, and show the Background layer you have this...

Eyes
- Insert a new layer at the top, name it "eye'...
- Set colors back to default.


Use the Ellipse shape tool - set the thickness to 5 - set to draw outline and fill.

Draw an oval/circle for the eye...

Click off to set the circle.
Then change the Ellipse to fill only...

... and draw a pupil.

- Duplicate the eye layer.
- Move the other eye over.
- CTRL+D to deselect.
Move both eyes where you want them - they should be on the right side of the face, not in the middle.


Eyebrows
- Insert a new layer - rename it "eyebrow".
- Choose a red eyebrow color...


Use the Trapezoid shape tool - set to fill only...

Draw a trapezoid - rotate and size it over the first eye...

- Duplicate the eyebrow layer.
- Go to up to the Layers menu and choose "Flip Horizontal"
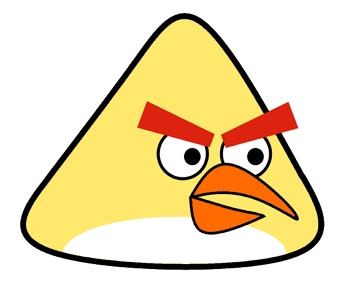
- Then move it over the other eye, move it so it is sticking out of the body a bit. You may also move the eye positions...


Beak
- Insert a new layer, name it "beak"...
- Set colors back to default...

- Use the Line/Curve tool - thickness 5px...
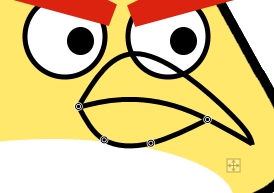
- Draw the top part of the beak using 2 lines, something like this, going over part of the right eye; make sure lines are closed/connected.


Then draw the bottom part of the beak using 3 lines (closed mouth) or 4 lines (open)...


Head Feathers
Insert a new layer at the top, call it "feather top".

Make sure colors are default - black = primary.
Then select the Shape tool - and set it to the 6-pointed star. Draw a star.

Now go up to the Effects menu and then choose Distort>Twist... play with the center and settings to get something like this...

Then select the area around the shape using the Rectangle Select tool and then use the Move Selected Pixels tool to move it over and rotate it to be what you want.

Deselect (CTRL+D) and move the layer down below the body fill layer...


Tail Feathers
Duplicate the feather layer. Go to Layer>Flip Vertical...

Select the tail shape with the Rectangle Select tool. Then use the Move Selected Pixels tool to move and rotate it into position...

CTRL+D to deselect and you should have something like this...
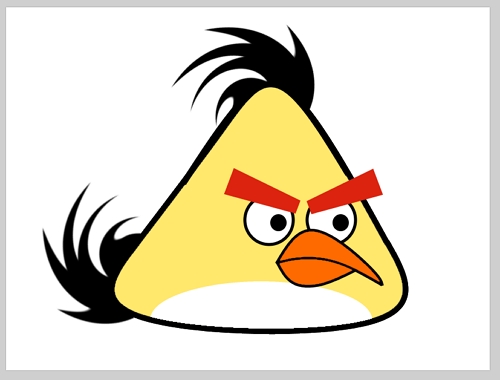
Adjust Colors
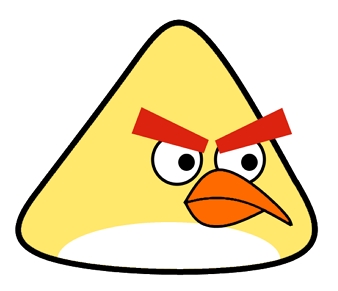
If you want to adjust the colors of any of the your layers - just select the layer, go up to the Adjustments menu and choose "Hue/Saturation" - play with the hue or saturation sliders. In my example, I'll select the body layer and make it a brighter yellow.

Background
Choose a purple color.
Select the Gradient tool.


Make the Background layer active and drag the gradient from top to bottom...

Click off somewhere and you're done. Save it!