
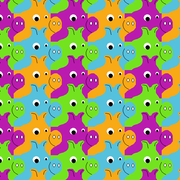
Tessellation: Animals


Check out more student examples here.
Canvas Size
Open Paint and go to Resize.
- First set to pixels.
- Uncheck the "maintain" box
- Set the size to 1100 x 850.

Adjust your Paint window so your canvas fits at 100% - adjust the instruction window to fit.

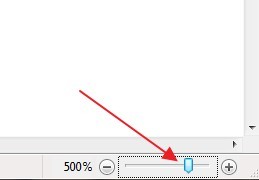
Zoom in to 500% using the slider at the bottom right of the window.
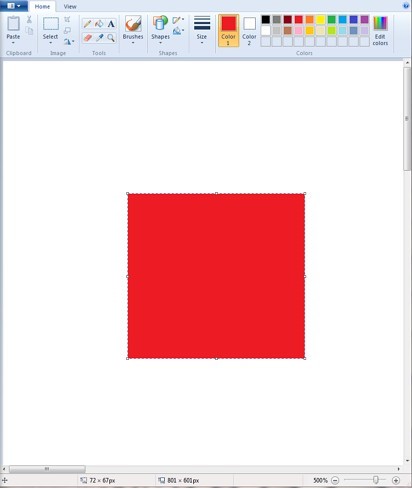
Colored rectangle
Select the Rectangle tool
- Colors: set foreground to red, background color to white.
- Outline = no outline
- Fill = solid color

Draw out a rectangle/square (by dragging while right-clicking) with lots of room around it.
Create animal shape: Sides
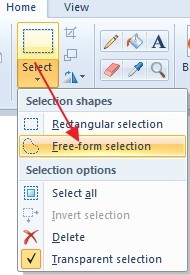
Set the Selection tool to "Free-form", making sure transparent is checked.
Select a part of the left side of the shape, making sure you use the entire side. Start outside and end outside the side of the rectangle!
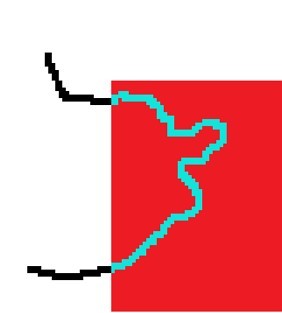
Move the selection using the right arrow key to the other side. Make sure you don't use the mouse or go up/down at all! Then click off.
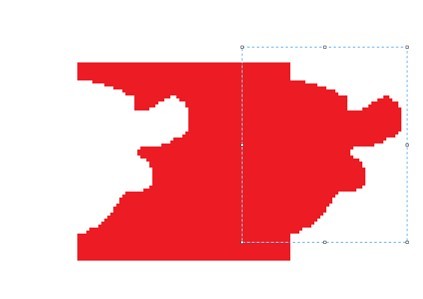

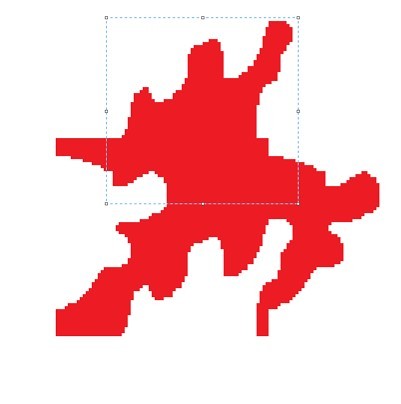
Create Animal Shape: Top/Bottom
Repeat the previous procedure, selecting from the top and sliding to the bottom (or vice versa).

Unique Animal, Add Details
Give your animal some eyes, mouth and other details using a white or black Pencil and circle shape.
- Set Color 1 back to default/black.
- Draw out an eye. Select the Circle shape, then drag out the eye shape (white).
- Draw out the pupil - black (right-click and drag out the shape).
- Draw other details with the Pencil tool - left click for black, right-click for white. Make sure you don't touch an edge.


Create a block of 4
Copy shape
- Zoom out to about 300%.
You want to be able to line up and fit your shapes together, see individual pixels. - Select your shape with the Rectangular Selection tool and Copy (CTRL+C).
The red one is now in memory. - Move it up to the top left corner of your canvas with a small margin around it.

Paste shape 3 times
- Using the Paint Bucket tool, change the color of the shape you have to any color other than red (=the color of the one that's in memory).
- Paste (CTRL+V) and move the shape into place so it fits the first one; checking with the arrow keys that it fits perfectly, not too high/low.

- Change the color of the shape you just pasted and moved to anything else.
- Paste and move the copy into place.

- Change the color of the shape you just pasted.
- Paste and move the copy into place.

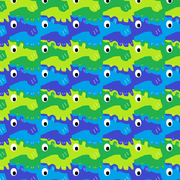
Now you can decide which colors you want your block of shapes to be.

So you end up with something like this...

Fill Canvas
First copy
- Select the entire block and Copy.
- Move your original block close to the upper left corner, where you can see the entire shape still.
- Paste and move to line up (matching horizontally or vertically, not staggered - you don't want to end up with 2 shapes of the same color touching!)

Copy down - create column
- Scroll down a bit so you can see the bottom of your block of animals, where want to paste more.
- Use the keyboard shortcuts:
- CTRL+A to select everything,
- Copy (CTRL+C).
- Paste (CTRL+V).
- Repeat this process until you've reached the bottom of your first column.

Fill canvas - paste across
Scroll to the right and all the way up to the top of the canvas so you're ready to copy/paste across...

Repeat the process, scrolling over the right each time for the next block of animals...
- scroll over
- CTRL+A
- CTRL+C
- CTRL+V
When you can't go anymore to the right, you've reach the other side, go back to viewing at 100%.

Crop
Select with the area that's completely filled with shapes, no white spots, then use the Crop button.
